3. Uploading and managing imagery
Learn more about how to upload imagery to the CMS and how the asset manager works.
1. Creating an image folder
Before uploading any prepared media assets to the CMS, you’ll need to ensure they have an appropriate folder to be stored in. For any new pieces of content, you will need to create a new asset folder.
All media assets are stored in folders in the Media tab of the Assets pane, found on the right-hand side of the CMS. The folder structure varies depending on content type. The guide below outlines the process to follow when uploading images.
See the CMS visual overview for reference
1.1 News
News images should be added in the following folder: For All Sites > images > news – followed by the year and date of the news story. I.e. if you’re publishing a news story in January 2025, you should use the following folder: For All Sites > images > news > 2025 > 01 january. Please remember, images aren’t compulsory for a news page.
Once you have located the correct month folder, you must create a new subfolder to store your image(s).
- Hover over the month folder until the ellipsis appear on the right-hand side
- Click on it, then select “New Folder”
- The name of your folder should be the title of your news story in lower case. E.g. “arup support helps belfast grand central station welcome first passengers”
- Should you make any errors, you can rename your folder by clicking on the ellipsis next to it and selecting “Rename”
If you’re adding images to a page that already exists, you should navigate to the correct folder in the Assets tree.
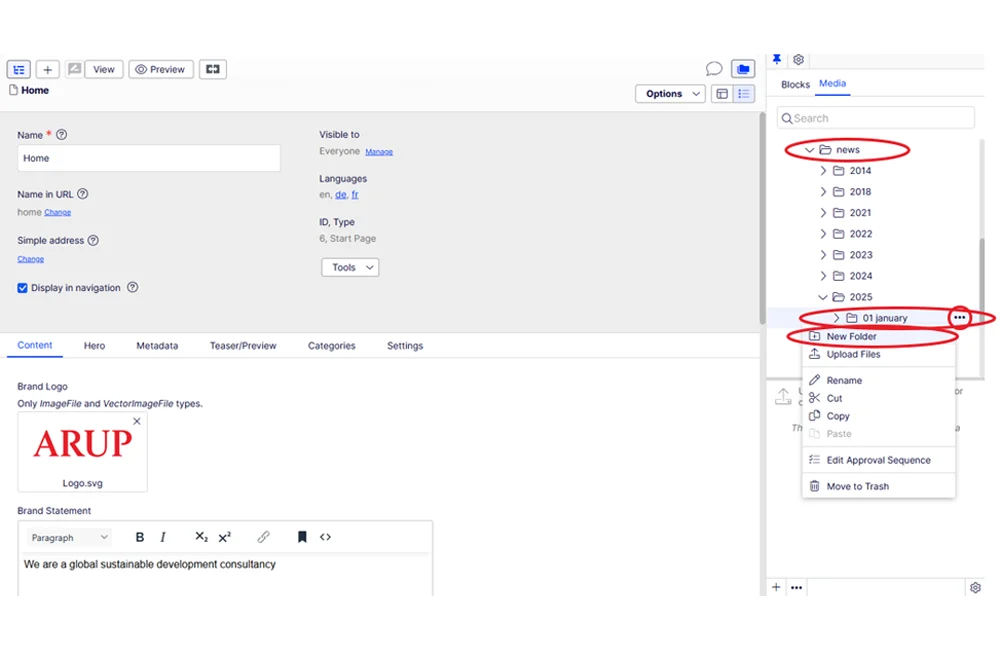
Figure 1: Creating an image folder for a news page.
1.2 Projects
Project images should be added in the following folder: For All Sites > images > projects. You’ll be presented with alphabetised subfolders, and you should create a new folder depending on the first letter and number of your project.
Once you have located the appropriate folder, you should create a new subfolder to store your image(s).
- Hover over the folder your project should fall under until the ellipsis appear on the right-hand side. E.g. if you were creating a project page for Sydney Opera House, you should use the “s” folder. For 1 Triton Square, you should use the “1” folder
- Click on it, then select “New Folder”
- The name of your folder should be the project name in lower case. E.g. “1 triton square”
- Should you make any errors, you can rename your folder by clicking on the ellipsis next to it and selecting “Rename”
If you’re adding images to a page that already exists, you should navigate to the correct folder in the Assets tree.
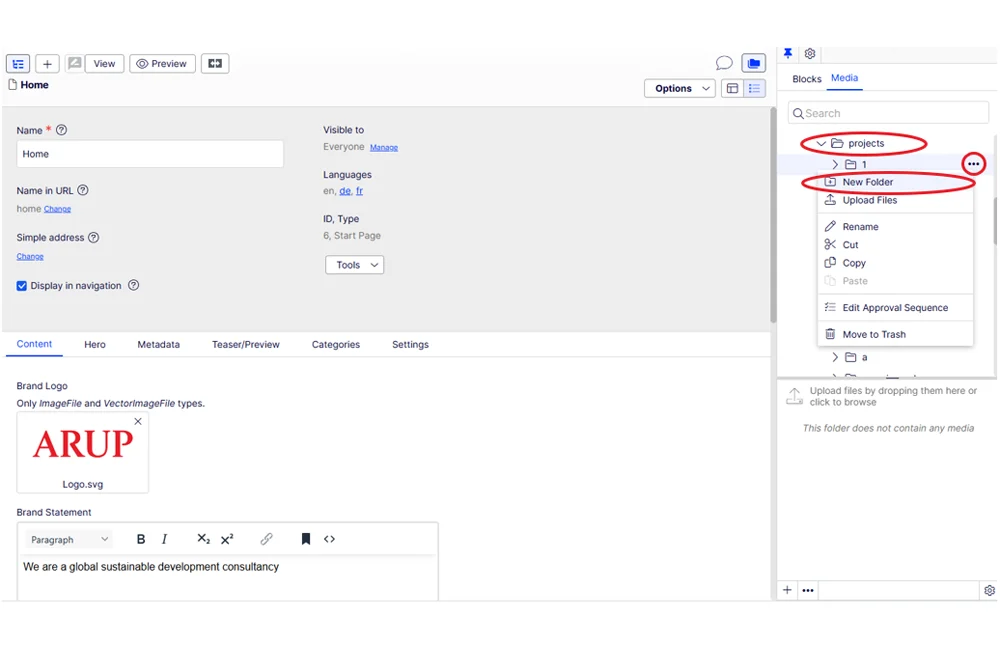
Figure 2: Creating an image folder for a project page.
Uploading images
Once you have created your folder, there are a couple of ways you can upload your images.
2.1 Method 1
- In the assets tree, click on your folder and then click the + icon in the bottom left corner of the pane
- Once the “Upload Files” pop screen appears, click the + icon again which should appear near the top left of the pop up
- Locate your files, select them and click open. You can upload them all at the same time

Figure 1: Creating an image folder for a project page.
Uploading images
2.2 Method 2
- Click on your folder in the assets tree to open it
- Have the folder you have stored your saved images open in another window
- Drag and drop your saved images into the asset area of the asset tree. You can upload them all at the same time
N.B. Keep an eye on the “Upload Files” screen after you upload your images to double check you have named them correctly and that they are at the correct file size.
If you later decide not to use one or more of the images that you have uploaded, please delete them from the CMS. To do this, hover over the asset until the ellipsis appear. Click on it and then select “Move to Trash”.
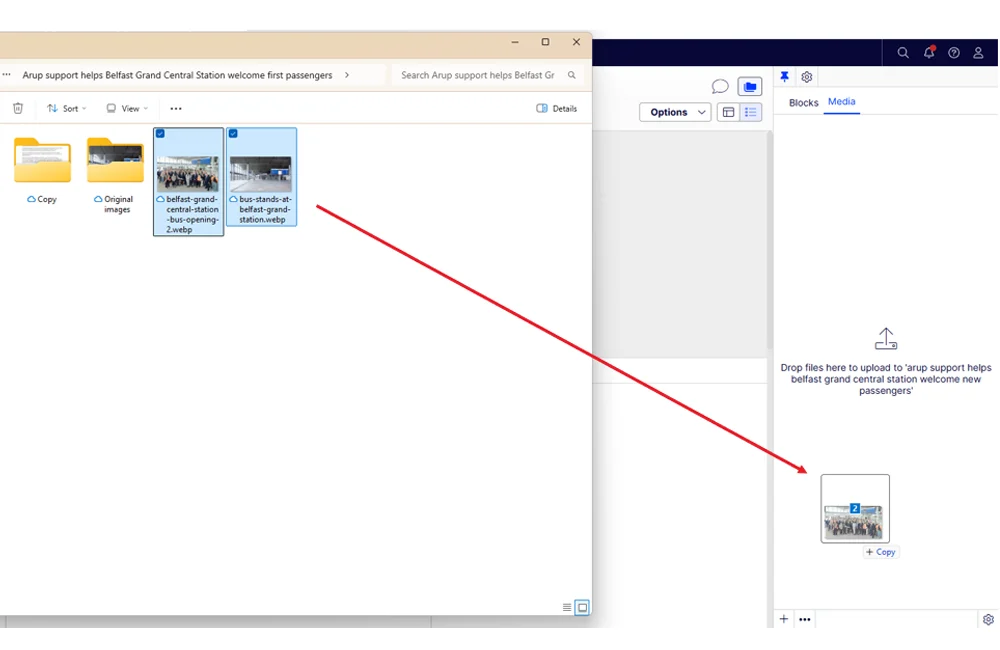
Figure 4: Method 2 of uploading images to the CMS.

Figure 5: Check images size after uploading images.
3. Adding alt text
The system will not prompt you to add text. You must remember to do this yourself. It’s best to do this immediately after you upload your images so you don’t forget to do this later.
To add alt text, either double click on the image(s) to edit them or hover over each one, click on the ellipsis and click “Edit”.
You should add your alt text into the “Alt Text” field. The alt text should describe what’s in the image to ensure your content will be accessible to all users.
After adding your text, wait for the image to autosave (you may need to click out of the text box), click on the “publish” button, then click “publish changes”.
You’re now ready to build your page.

Figure 5: Check images size after uploading images.